How to Build & Deploy & Host Angular static site with Azure blob storage static websites


Why pay for expensive hosting when you don’t need to? This post isn’t about Azure static web apps, which is a fantastic product, but what if you don’t need any azure function apps? or don’t want to use GitHub actions?
Thankfully there is an answer to that, and that answer is Azure Storage Static Websites. By enabling the static website feature on a blob storage account, you host a static website extremely cheaply. Even cheaper if you pair it with a CDN.
I’m going to take you through the steps involved in building, deploying & hosting an angular website in azure blob storage. This follows the same pattern I’ve used to host this website.
How to build an Angular static website
First things first, we’re going to need an example project which can deploy into Azure blob storage for static website hosting.
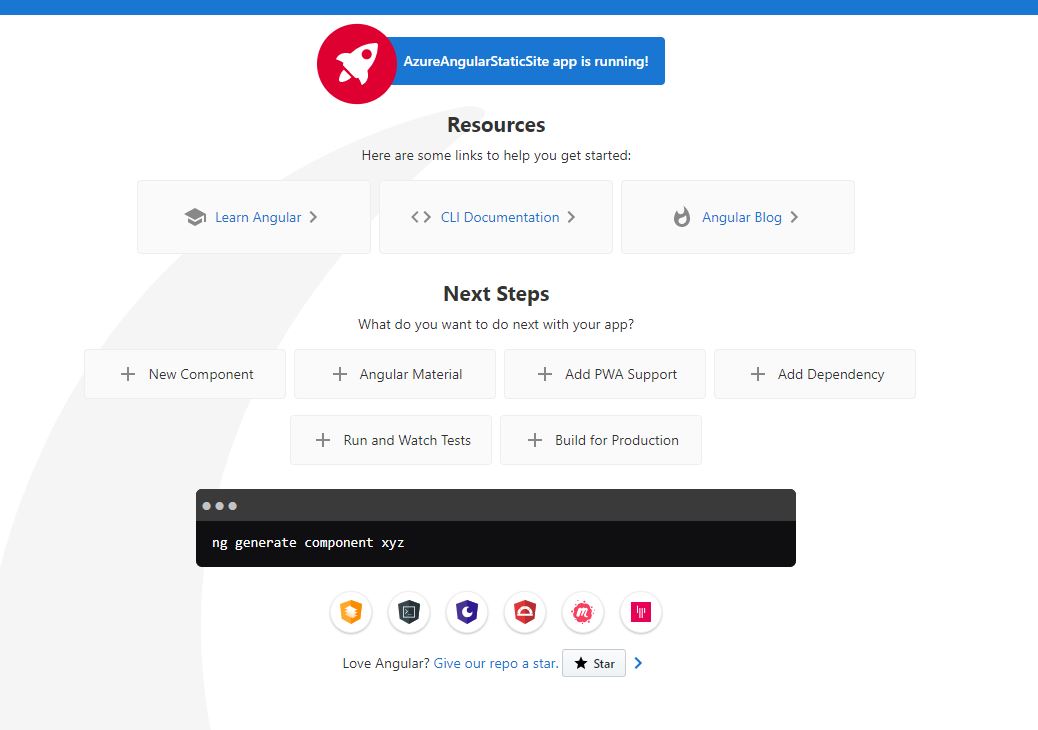
This isn’t anything special. This is just an Angular site which has been initialized using ng new.
// clone the project
git clone https://github.com/AdamWhite/coa-azureAngularSS

// install all of the project's dependencies and start up the project
npm install
npm start
Once it’s started, you’ll be able to open the website in your preferred browser by navigating to http://localhost:4200
Prerequisites
I’ve provided an example project, but you should be familiar with how Angular works and Angular builds. If you aren’t then, I highly suggest you check out the official Angular documentation & Angular CLI.
Assuming you’ve got all the necessary components set up and you’ve managed to get the example project working on your local machine, then it’s time we got stuck into this. You will need a Microsoft Azure account with an active subscription. This may be a pay as you go, like mine, or credits from your company.
Right, let’s get to.
Create a Storage Account
To host your website, you will need an Azure storage account. This will contain all of your files. Storage accounts can be used for a wide range of things. They can hold blobs, files, queues, tables, and disks.
The storage account gives you a unique namespace for all of your storage data; this data is inaccessible to the world by default over HTTP & HTTPS.
Let’s create a storage account to hold our angular site, but wait? Don’t we need a resource group? Aren’t resource groups a container to group resources under?.
Absolutely, but when you create a storage account, you can create a resource group at the same time. Click Create a resource, search for storage account and then click create
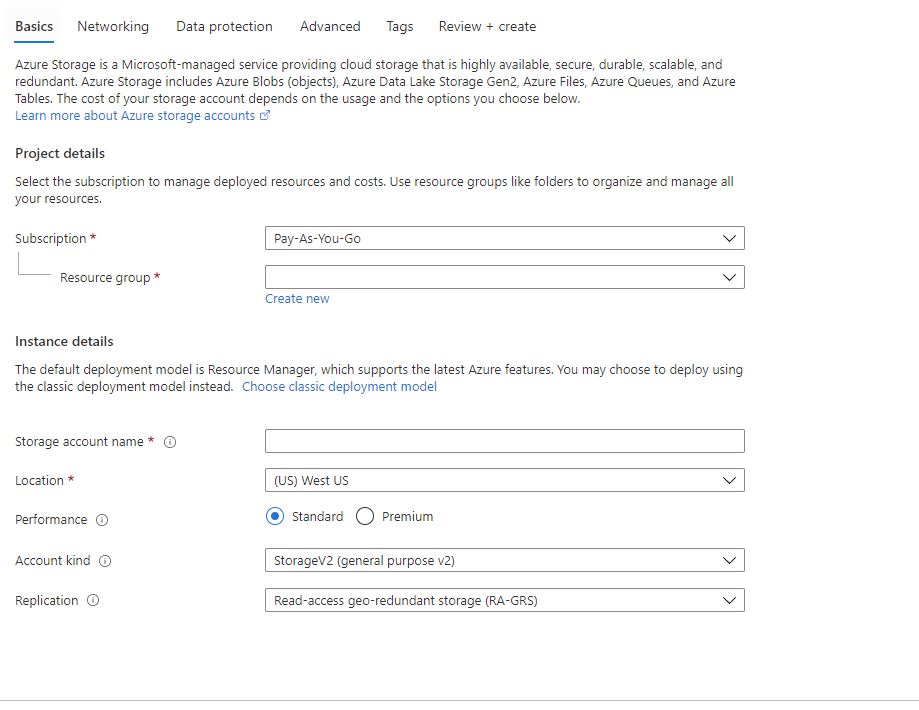
Go through and fill out the form:
Resource Group:
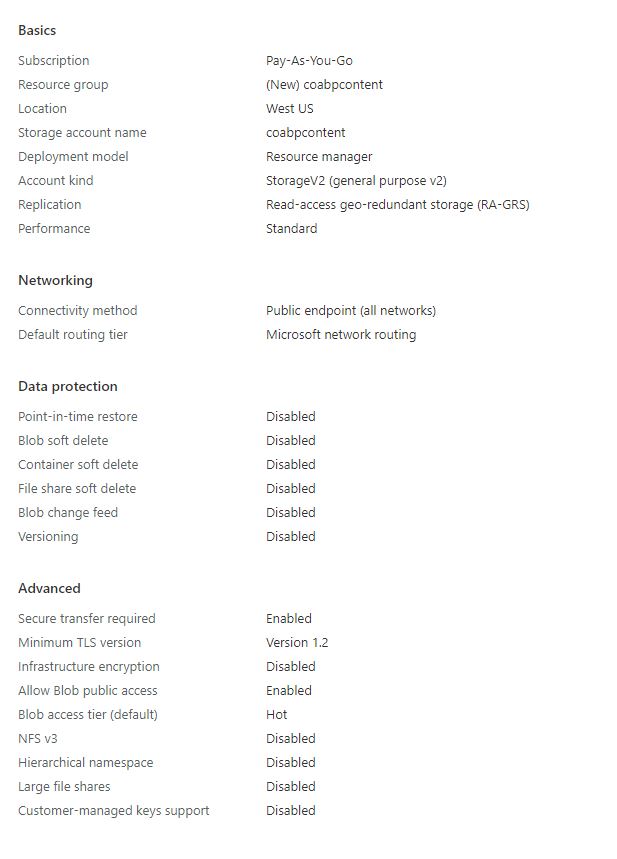
Click review + create. Once done, you’ll see the following screens.
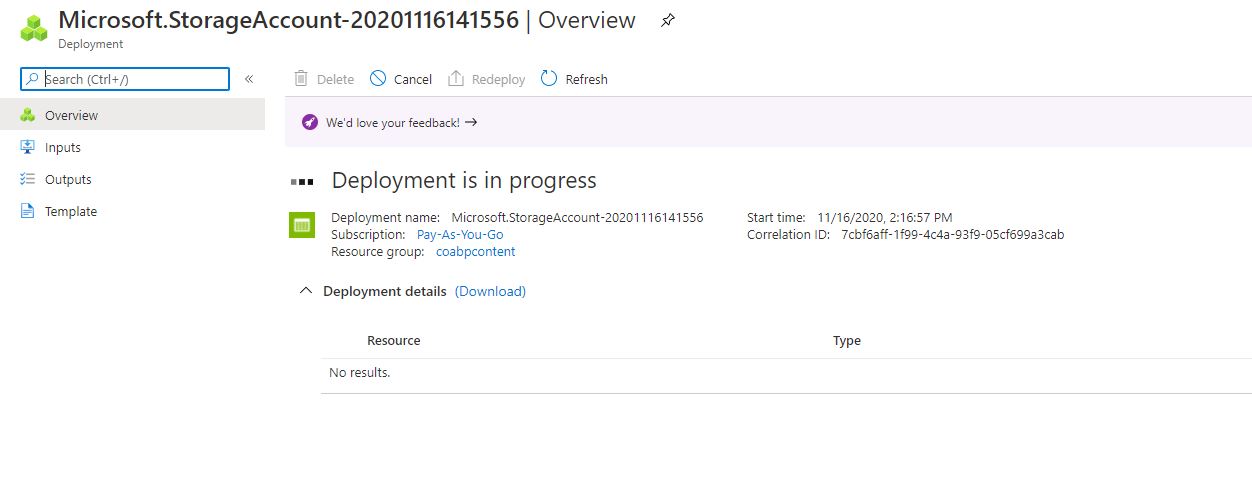
After a few second’s the message will change to “Your deployment is complete” and a “Go to resource” button will show. if you click that, it’ll take you to the newly created storage account
Host a Static Website with Azure Blob Storage
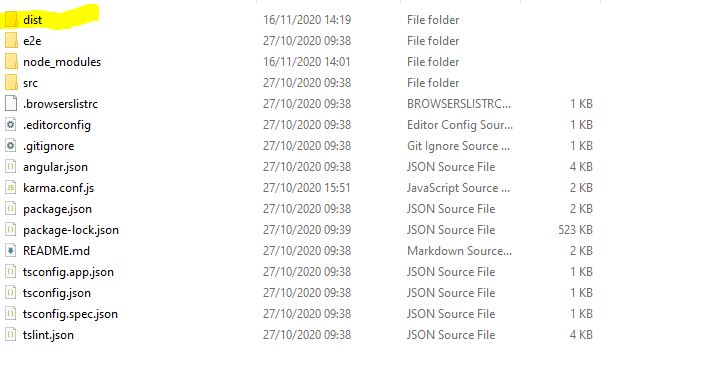
Right now, we have an Azure account, a resource group, and a storage account created. It’s time to build our angular app. To do this, run the following command within the /site folder npm run build this will generate a new folder called dist this folder will contain all of the files we’ll want to upload.
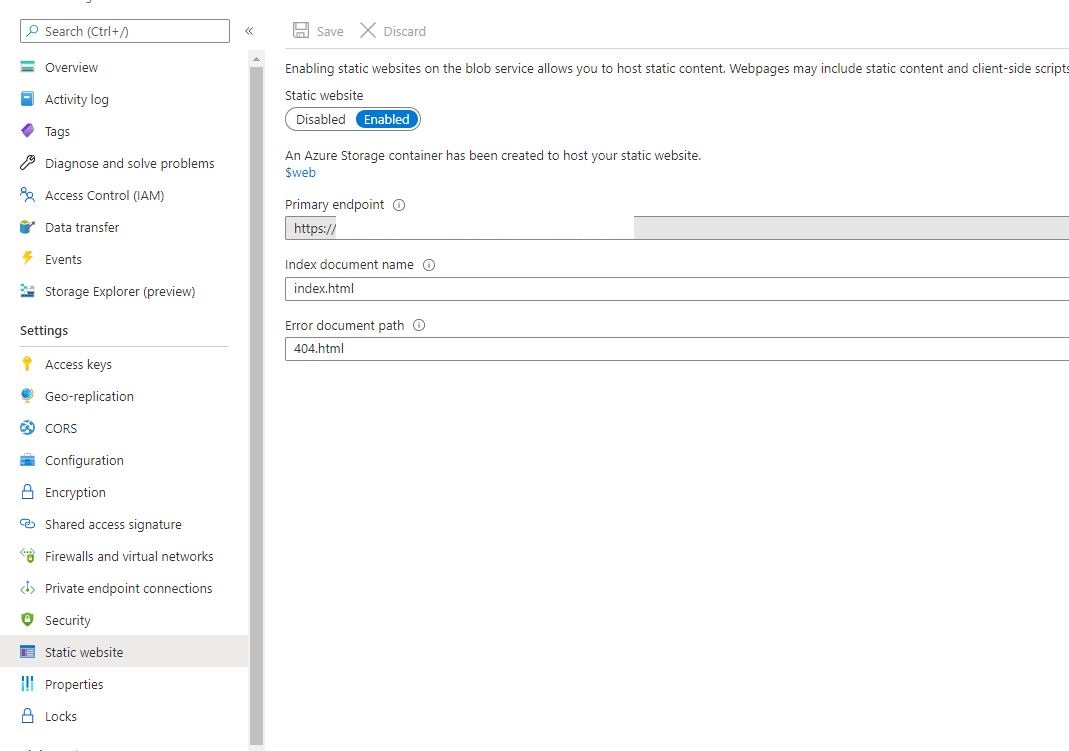
Navigate to your storage account within Azure and click on the static website menu option the set the following settings:
Static Website: Enabled Index Document name: index.html Error Document path: error.html
Click Save.
Once you’ve enabled static website within your storage account, your storage account will contain a container called $web, this is the container where you’ll upload the angular build files; as apart of the process, you’ll also have been assigned a primary endpoint, this endpoint is what we’ll use to see the angular site.
Upload all of the files from your dist folder into the $web container

Copy the primary endpoint from the static website blade
And paste it into your preferred browser. Say hello to your angular site!
What if I want to use a subdirectory?
Sure, no problem, when uploading the dist folder, select advanced, and fill in the “Upload to folder” with the folder name you wish to use.
You’ll want to build your angular app specifying the deploy-url flag with the folder you want to host from. i.e. if the folder is to “myFirstStaticSite” then the command you’d use is ng build --deploy-url /myFirstStaticSite/
Deploying with VSCode
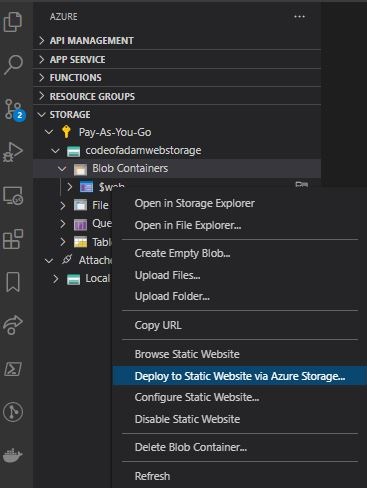
I’m using VSCode to work on my angular app; by adding the Azure Storage extension into VSCode, I am able to very easily deploy the sites files directly into my static website container.
All I need to do is right-click the $web container in the Azure and then clicking Deploy to Static Website via Azure Storage
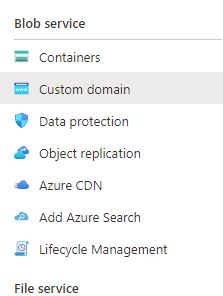
Use a custom domain
To add a custom domain go to the custom domain blade under blob service:
All you need to do in this section is add your custom domain name, but to be successful, you will need to add a cname record against your domain within your domain provides control panel.
So head over to your domain registrar and add a cname record for whatever subdomain (www for example) which points to one of the two URLs listed by Azure
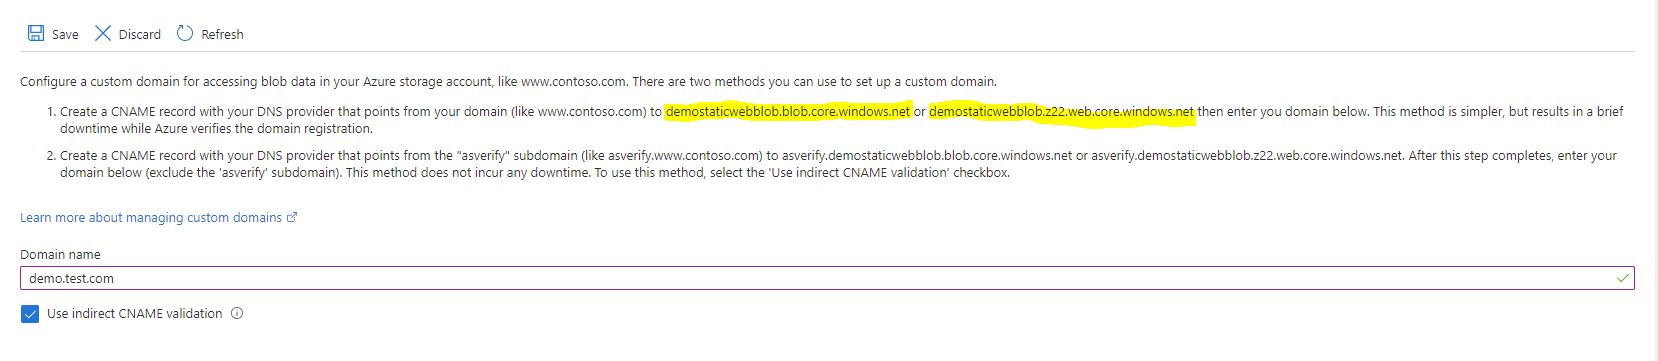 I set my values to be www & demostaticwebblob.z22.web.core.windows.net, TTL 30 mins.
Now you need to play the waiting game; these changes don’t happen immediately; there is some delay. You can google for tools to check your cname records. Once the new record is appearing, go back to Azure and hit save.
It’ll take a minute or two before it all works, but if you go to your custom domain. i.e. demo.test.com
you’ll see something like:
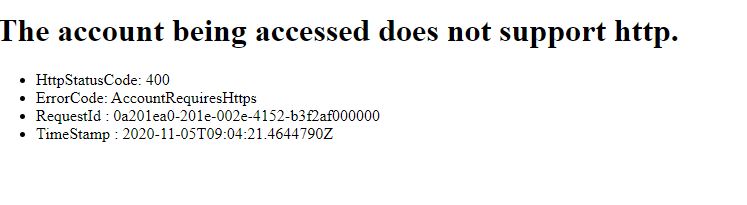
We can’t access the site via HTTP. We must use HTTPS, so modify the URL to be https://demo.test.com (or whatever your URL is), and if you use Chrome, you’ll get:

Click Advanced, then Proceed to.
Ta-Da! Your website. The problem is, no one really wants to go through those steps and certainly doesn’t want the whole Not Secure / Connection Not private experience. So how do we fix this?
Azure CDN.
Deliver the site with Azure CDN
Using a CDN makes a huge amount of sense. By enabling the Azure Content Delivery Network (CDN), you can cache the content from your static website, which has been hosted within an Azure Storage account. This will provide consistent low latencies for users of your website anywhere in the world as the files will be hosted close to them.
If someone from Brazil attempts to hit a site that’s hosted in a storage account hosted in the UK South region, that’s a long distance for the bytes to travel. However, if a cached copy exists in a CDN node within Brazil, well, then the bytes don’t have as far to travel. Drastically reducing the latency.
Plus, as you may have noticed in the custom domain section, we are forced to use HTTPS to communicate with our static website, yet we have no way to assign/generate an SSL certificate… using Azure CDN fixes this.
Select the Azure CDN blade under the blob storage menu, the fill out the create new form with the following:
CDN Profile: my-first-static-site Pricing tier: Standard Microsoft CDN endpoint name: my-first-static-site Origin hostname: select the one marked (Static Website)
If the creation is successful, you’ll see the newly created endpoints under the Endpoints section.
Click on the newly created endpoint (it’s just above the form). Here you’ll see a list of custom domains, which there shouldn’t be any—click + custom domain. Then fill out the form, which is just the custom domain. For this site, I entered www.codewithadam.com.
Now, this won’t work. You get an error, or rather the box will highlight red and by hovering over the ! You’ll be told that there is no cname record that points to
So we need to go back to our hosting provider and update the cname record, changing from the storage account endpoint to the one listed on this form. This, again, will take a little while to propagate.
Once propagated, click add.
On the endpoint page, it’ll say something along the lines of: Creating custom domain ’< your domain>’ then after a while, you’ll get a successfully created message.
Configure Custom Domain HTTPS
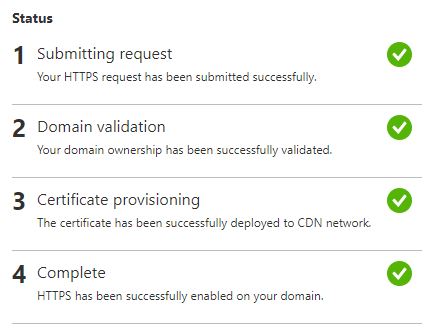
You’ll see that under Custom Domains, it stays “Custom HTTPS” disabled. Click your custom domain and click On for Custom Domain HTTPS, leave the TLS version to whatever the default is and click save.
This will take a few minutes. After a little while, you’ll see the page change to show the status:

Just wait, as things happen that section will update. When it’s all done you’ll see:
If you go to your custom domain, it may still show insecure. It’ll take some time for all the settings to propagate across the DNS networks.
Do note that after you’ve created a new CDN endpoint, it won’t be immediately available; it takes a few minutes for the registration to propagate through the CDN network. So if you hit the CDN URL, you may get an error page.
<h2>Our services aren't available right now</h2><p>We're working to restore all services as soon as possible. Please check back soon.</p>If you don’t see your angular site after 10 minutes, I suggest going through this troubleshooting page
Force HTTPS
So, we’ve enabled the CDN, but what if we hit HTTP, well we get an error that’s not good, and the user won’t know what to do. So let’s utilize the power of the CDN Rules Engine to automatically redirect HTTP -> HTTPS.
Under settings click Rules Engine then click + Add rule fill in the form, like the below:

Automation of it all (rename)
Ok, so we’ve set up the site on Azure, it’s working well, but what about when we have a change, are we going to have each developer build their changes locally and copy their files into the storage account? No, we don’t do that anymore!
This is where Azure DevOps comes into play.
To automate the build and deployment of the website, we’ll follow the following steps.
- Create a Azure DevOps account
- Create a project
- Create a build pipeline
- Create a release pipeline
Create an Azure DevOps account
Azure DevOps is free, so head over to https://dev.azure.com and create an account.
Create a project
Click new project and fill in the form with the following values.
- Project Name: firstAngularStaticSite
- Visibility: Private
Click create.
Create a build pipeline
You’ll be greeted with your dashboard, click pipelines on the left, then click create pipeline
You’ll be asked where your code lives. I have mine hosted in GitHub. Chose the option that works for you. If you’ve selected GitHub, you’ll see a list of repositories you have access to; select the one which holds the code.
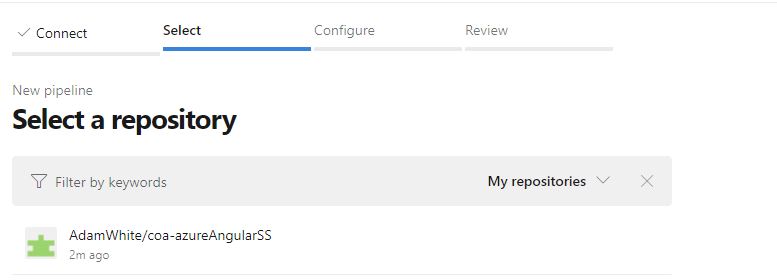
You’ll be redirected to GitHub to confirm access.

Select the repository and then click approve and install. You’ll then be redirected back to Azure DevOps.
Select Node.js with Angular under Configure your pipeline
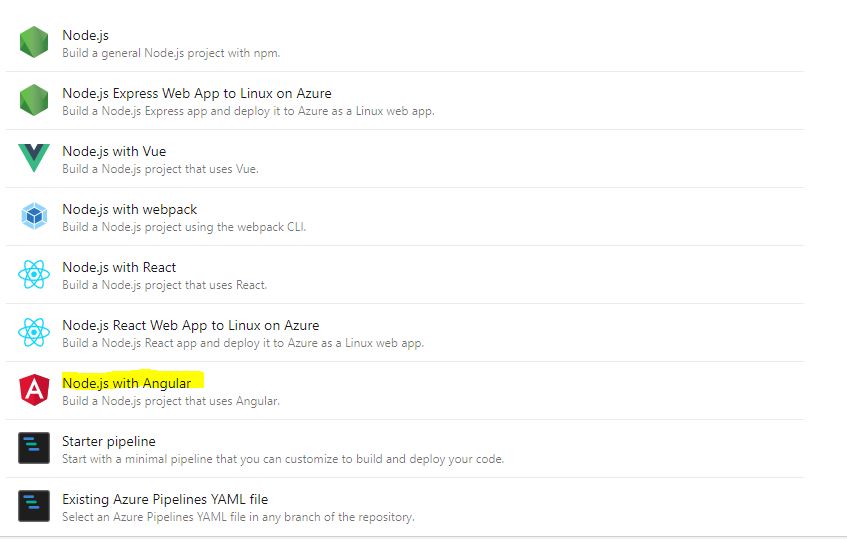
you’ll be greeted with a page to review the YAML; I suggest replacing it with the following
# Node.js with Angular
# Build a Node.js project that uses Angular.
# Add steps that analyze code, save build artifacts, deploy, and more:
# https://docs.microsoft.com/azure/devops/pipelines/languages/javascript

trigger:
- main

pool:
 vmImage: 'ubuntu-latest'

steps:
- task: NodeTool@0
 inputs:
   versionSpec: '12.x'
 displayName: 'Install Node.js'

- script: |
   npm install -g @angular/cli
   npm install
 workingDirectory: $(Build.SourcesDirectory)/site
 displayName: 'npm install'


- script: npm run lint
 workingDirectory: $(Build.SourcesDirectory)/site
 displayName: 'Lint Angular'

- script: npm run build --prod
 workingDirectory: $(Build.SourcesDirectory)/site
 displayName: 'npm build'

- script: npm run test -- --no-watch --no-progress --browsers=ChromeHeadlessCI
 workingDirectory: $(Build.SourcesDirectory)/site
 displayName: 'npm test'

- publish: $(System.DefaultWorkingDirectory)/site/dist
 artifact: angular-app

- publish: $(System.DefaultWorkingDirectory)/arm-templates
 artifact: arm-templates
This will:
- trigger on changes to the main branch
- install node js
- install angular CLI
- install the sites dependencies
- lint the code
- build the production version of the site
- run the tests
- publish the production build into an artifact
- publish the arm templates into a separate artifact
Click save and run
This will trigger your first build, wait for it to run, and pass.
That’s the build pipeline setup.
Create a release pipeline
Now we have a build pipeline and a successful build, we can set up the release pipeline; this is what will do the deployment into Azure creating our static website.
Click releases on the left and then new New pipeline
Deploy storage account including CDN and custom domain
To deploy the storage account, including setting up a CDN and custom domain, we need to add the following.
A replace tokens task, set to look in JSON files. You can set this to a more specific location; I’ve just set it to scan all files and folders. By the time we’ve got here, we are working with a subset of the files. Though it does make sense to scope this to the build_resources folder.
Here’s the YAML from my task.
steps:
- task: qetza.replacetokens.replacetokens-task.replacetokens@3
  displayName: 'Replace tokens in **/*.json'
  inputs:
    targetFiles: '**/*.json'
The next thing we want to do is deploy an arm template, so add an ARM template deployment.
Set the connections to your subscription and deployment scope. I have variables for the resource group and region (see library on the left menu). Fill in the settings as per the YAML below.
steps:
- task: AzureResourceManagerTemplateDeployment@3
  displayName: 'Deploy storage account'
  inputs:
    azureResourceManagerConnection: XXX
    subscriptionId: 'XXX'
    resourceGroupName: '$(SITE_RG)'
    location: '$(SITE_REGION)'
    csmFile: '$(System.DefaultWorkingDirectory)/build_resources/build_resources/arm-templates/storage-application.template.json'
    csmParametersFile: '$(System.DefaultWorkingDirectory)/build_resources/build_resources/arm-templates/storage-application.template.parameters.json'
  enabled: false
The ARM template has been updated since this was created, so this step may not be required, but should it be. Add an Azure CLI step which executes an inline script.
The arm template is in the repository mentioned at the start of this article. but you can see it here
 az storage blob service-properties update --account-name $(SITE_STORAGE_ACCOUNT_NAME) --static-website --404-document 404.html --index-document index.html

     $staticWebsiteUrl = az storage account show -n $(SITE_STORAGE_ACCOUNT_NAME) -g $(SITE_RG) | jq -r '.primaryEndpoints.web'.trim('/')
Entire Yaml:
- Enable Static website on storage account
steps:
- task: AzureCLI@2
  displayName: 'Enable static website on storage account'
  inputs:
    azureSubscription: DevOps
    scriptType: pscore
    scriptLocation: inlineScript
    inlineScript: |
     az storage blob service-properties update --account-name $(SITE_STORAGE_ACCOUNT_NAME) --static-website --404-document 404.html --index-document index.html

     $staticWebsiteUrl = az storage account show -n $(SITE_STORAGE_ACCOUNT_NAME) -g $(SITE_RG) | jq -r '.primaryEndpoints.web'.trim('/')


  enabled: false
Now we have a site that has been set up, ready for content and an SSL certificate.
copy files into $web container
The final step of the release is the publish the code and content. As such, add an Azure CLI step, which will copy the content over.
This is again an inline script.
$key = az storage account keys list -g $(SITE_RG) -n $(SITE_STORAGE_ACCOUNT_NAME) --query [0].value -o tsv
az storage blob upload-batch -s ./build_resources/gatsby_build -d '$web' --account-name $(SITE_STORAGE_ACCOUNT_NAME) --account-key $key
steps:
- task: AzureCLI@2
displayName: 'Deploy angular app into $web'
inputs:
azureSubscription: DevOps
scriptType: pscore
scriptLocation: inlineScript
inlineScript: |
$key = az storage account keys list -g $(SITE_RG) -n $(SITE_STORAGE_ACCOUNT_NAME) --query [0].value -o tsv
az storage blob upload-batch -s ./build_resources/gatsby_build -d '$web' --account-name $(SITE_STORAGE_ACCOUNT_NAME) --account-key $keyWhen you visit your site, you will get an SSL error; here, I cover what’s required.
SSL
For SSL, I couldn’t do this via ARM, there is a preview feature, but that refused to work via Azure CLI or Azure Powershell. So instead until that’s GA, I suggest just manually setting the SSL certificate; it only needs to be done once. Further deploys make no change to this.
So go to the section called Configure Custom Domain HTTPS above and follow the manual steps. This will take some time to deploy.
But once done, your site will have it’s own free SSL certificate.
Summary
I’ve shown you how to build and release your Azure static site manually and then walked you through my Azure DevOps setup for releasing this site.
- Azure CDN paired with blob storage provides a lost cost and highly reliable static website hosting option; hence this site uses it.
- You do need to have an Azure account, active subscription, a resource group, and a storage account before you can create a static website on Azure
- Azure storage accounts come in a few flavors, but V2 is the best choice for most; it allows you to store blobs, files, queues, disks, and tables.
- Resource groups are a logical container for housing your resources
- Once the static website is enabled, all you need to do is upload the files into the
$webcontainer for your website to work - You can pair your static website with Azure CDN to ensure low latency throughout the world
- Once you setup a new CDN endpoint, there is a small delay while the change is propagated throughout the CDN network
- Should you face any issues this will help you troubleshoot
- You can map your storage account to a custom domain should you wish
- make sure to enable custom SSL to remove SSL cert errors